Stripe
Stripe Integration Setup Guide
Section titled “Stripe Integration Setup Guide”This guide will walk you through connecting your Stripe account to Chartivo to enable payment analytics and revenue tracking.
Prerequisites
Section titled “Prerequisites”Before you begin, ensure you have:
- An active Stripe account
- Administrator access to your Stripe Dashboard
Step 1: Access Chartivo Integrations
Section titled “Step 1: Access Chartivo Integrations”-
Log in to your Chartivo account
-
Navigate to the Integrations page from your dashboard
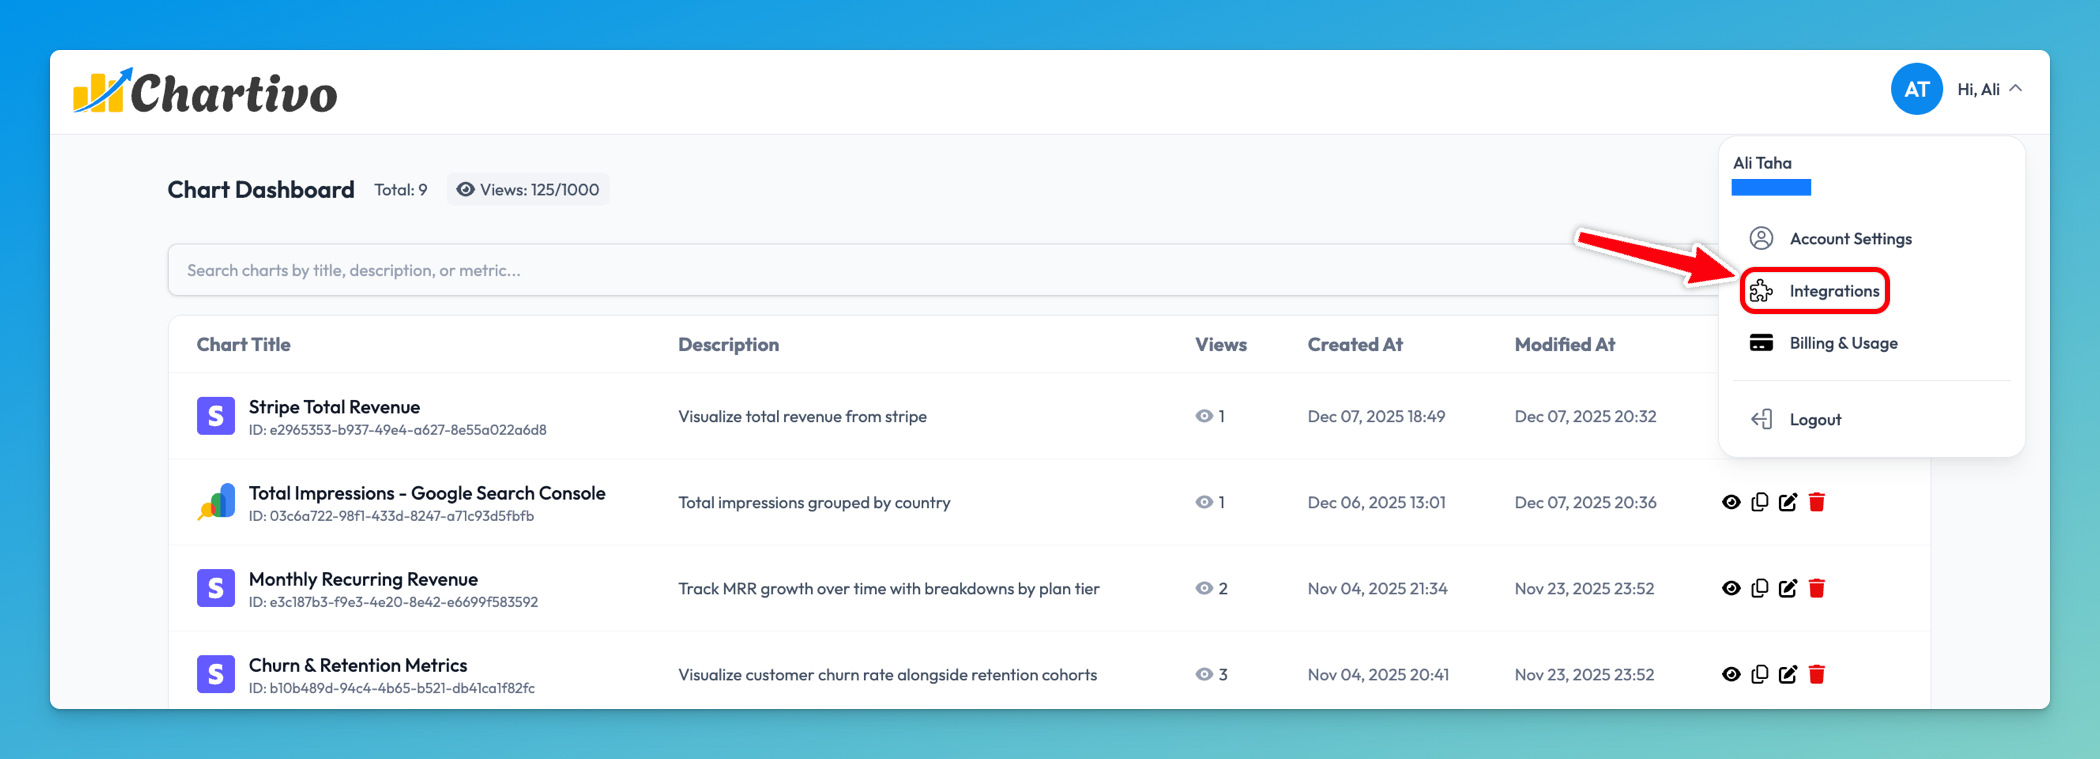
-
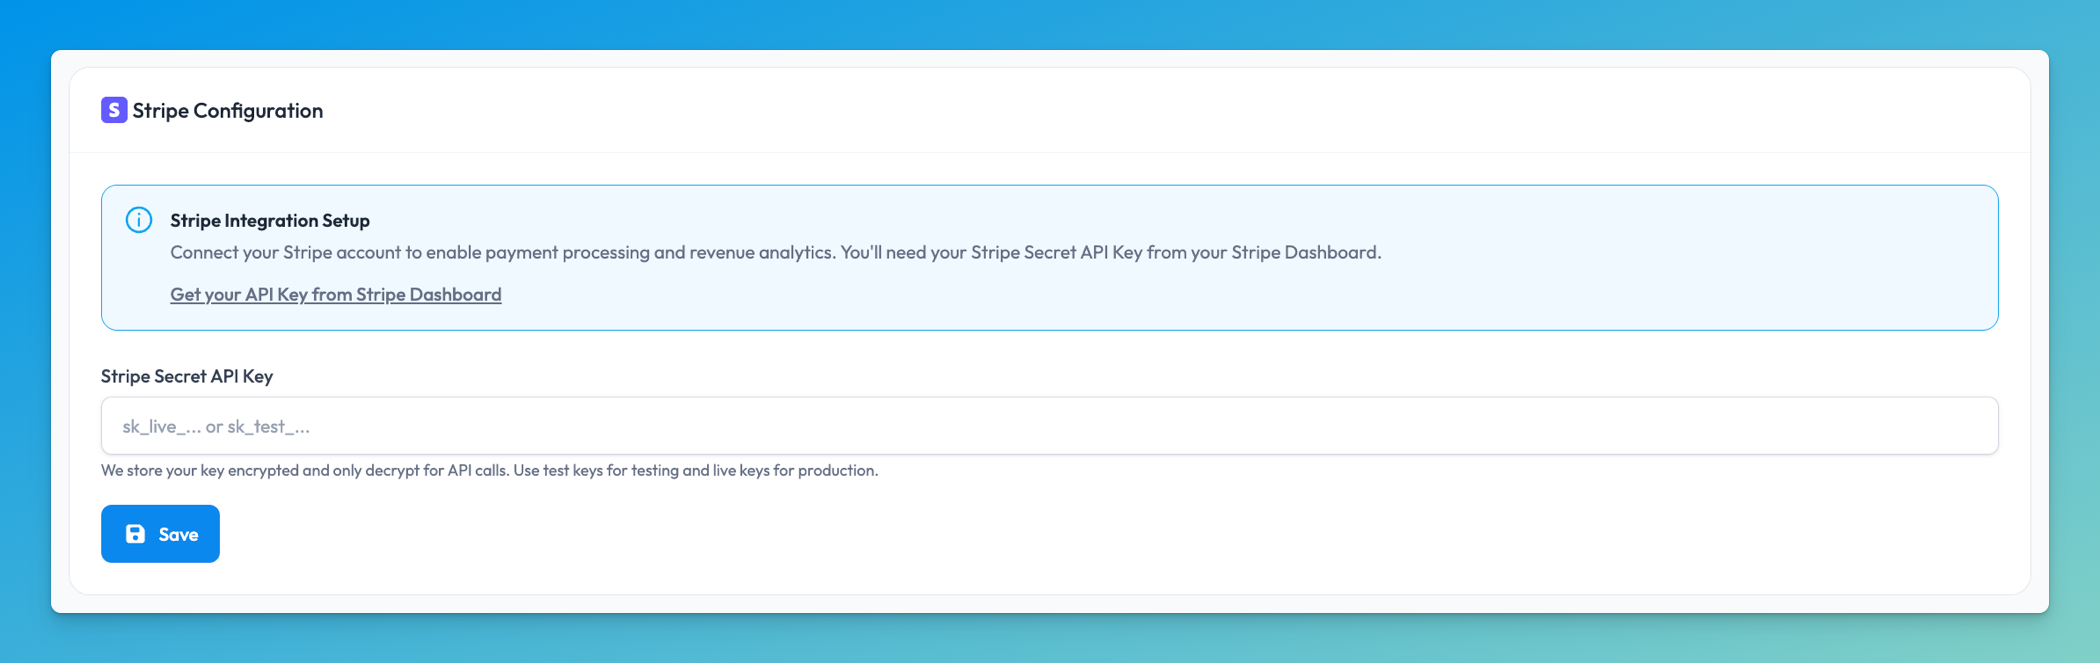
Scroll down to locate the Stripe Configuration card
Step 2: Access Your Stripe Dashboard
Section titled “Step 2: Access Your Stripe Dashboard”- Open a new browser tab and navigate to https://dashboard.stripe.com
- Log in to your Stripe account
- Ensure you’re viewing the correct account if you manage multiple Stripe accounts
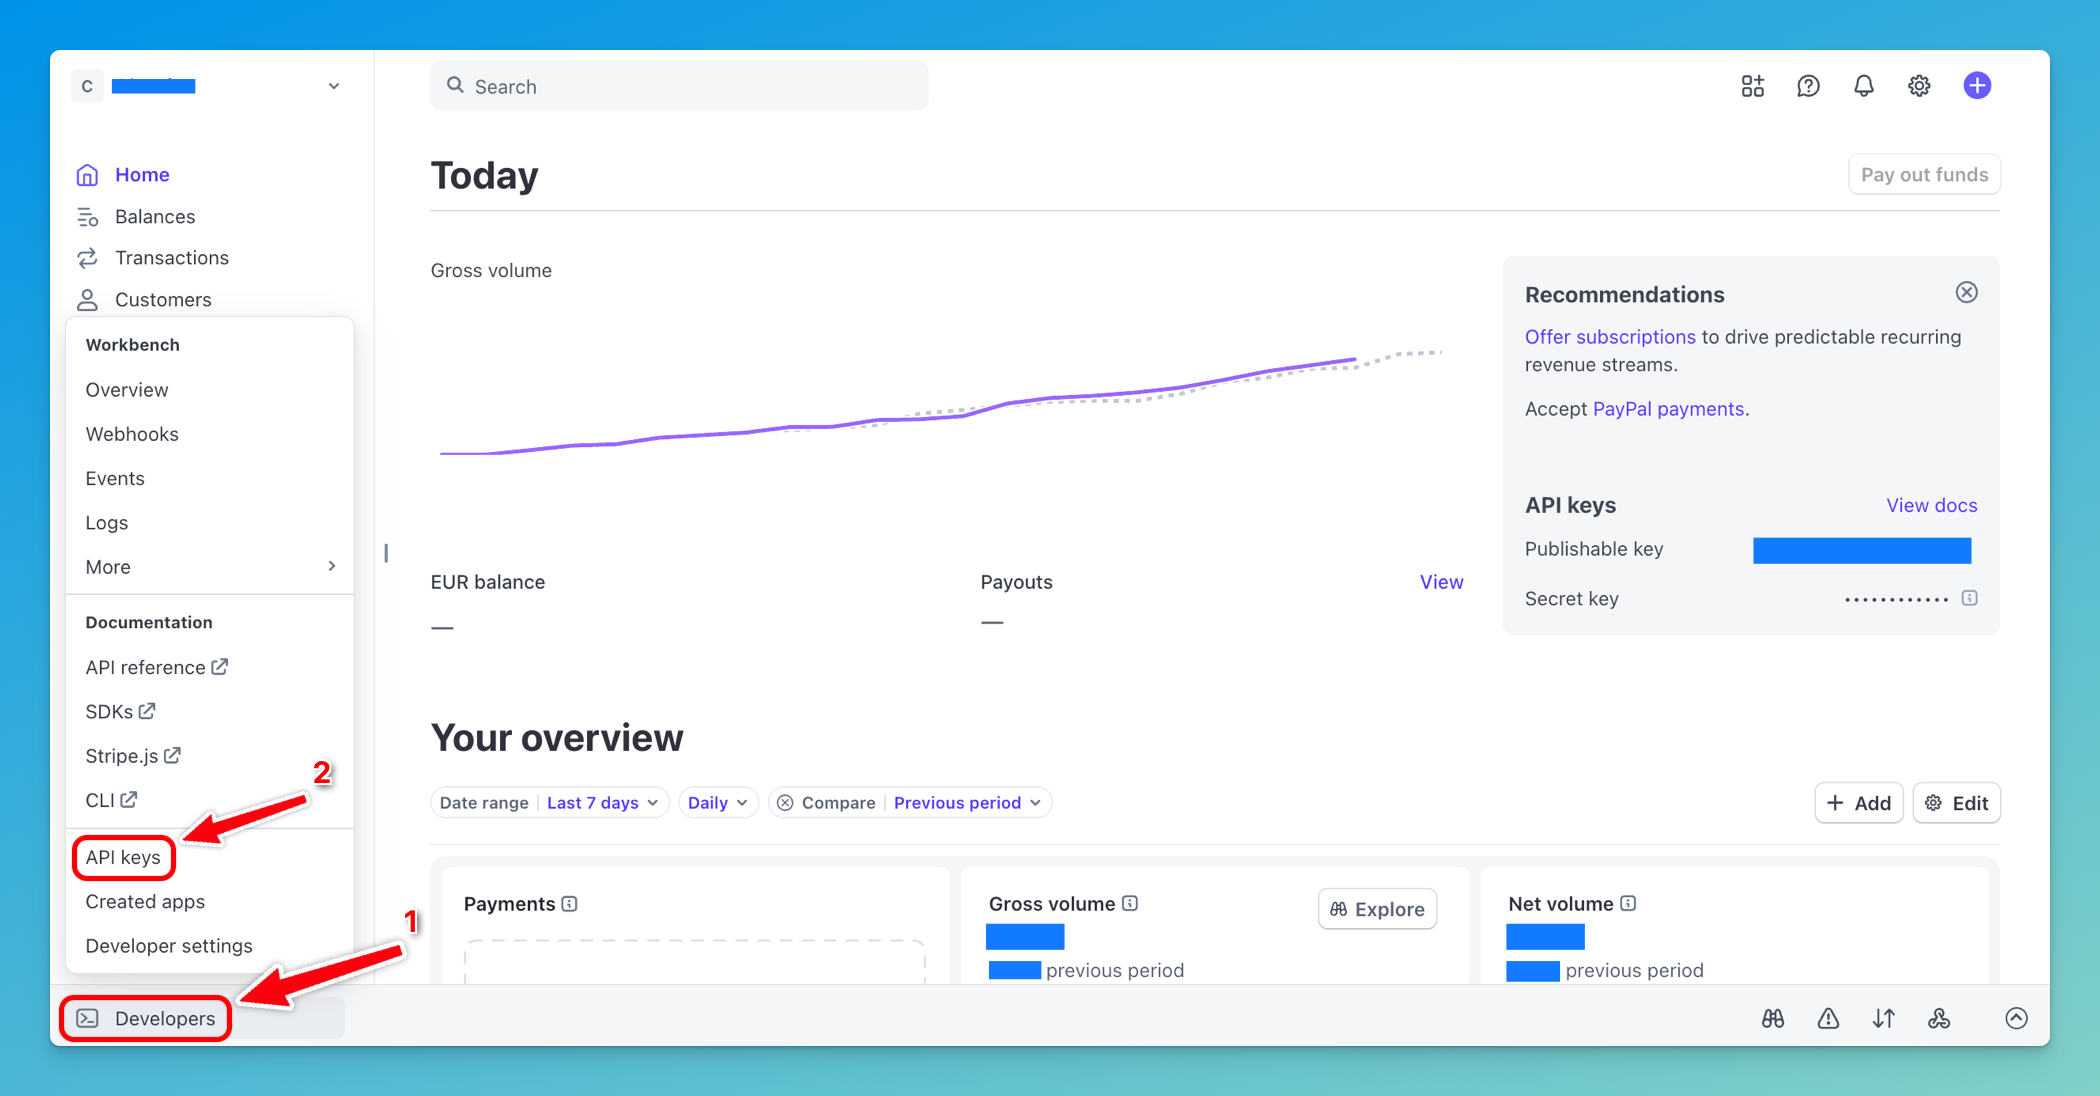
Step 3: Navigate to API Keys Section
Section titled “Step 3: Navigate to API Keys Section”-
In the Stripe Dashboard, locate the Developers section in the left sidebar
-
Click on API keys under the Developers menu
-
You’ll see two types of keys: Publishable key and Secret key
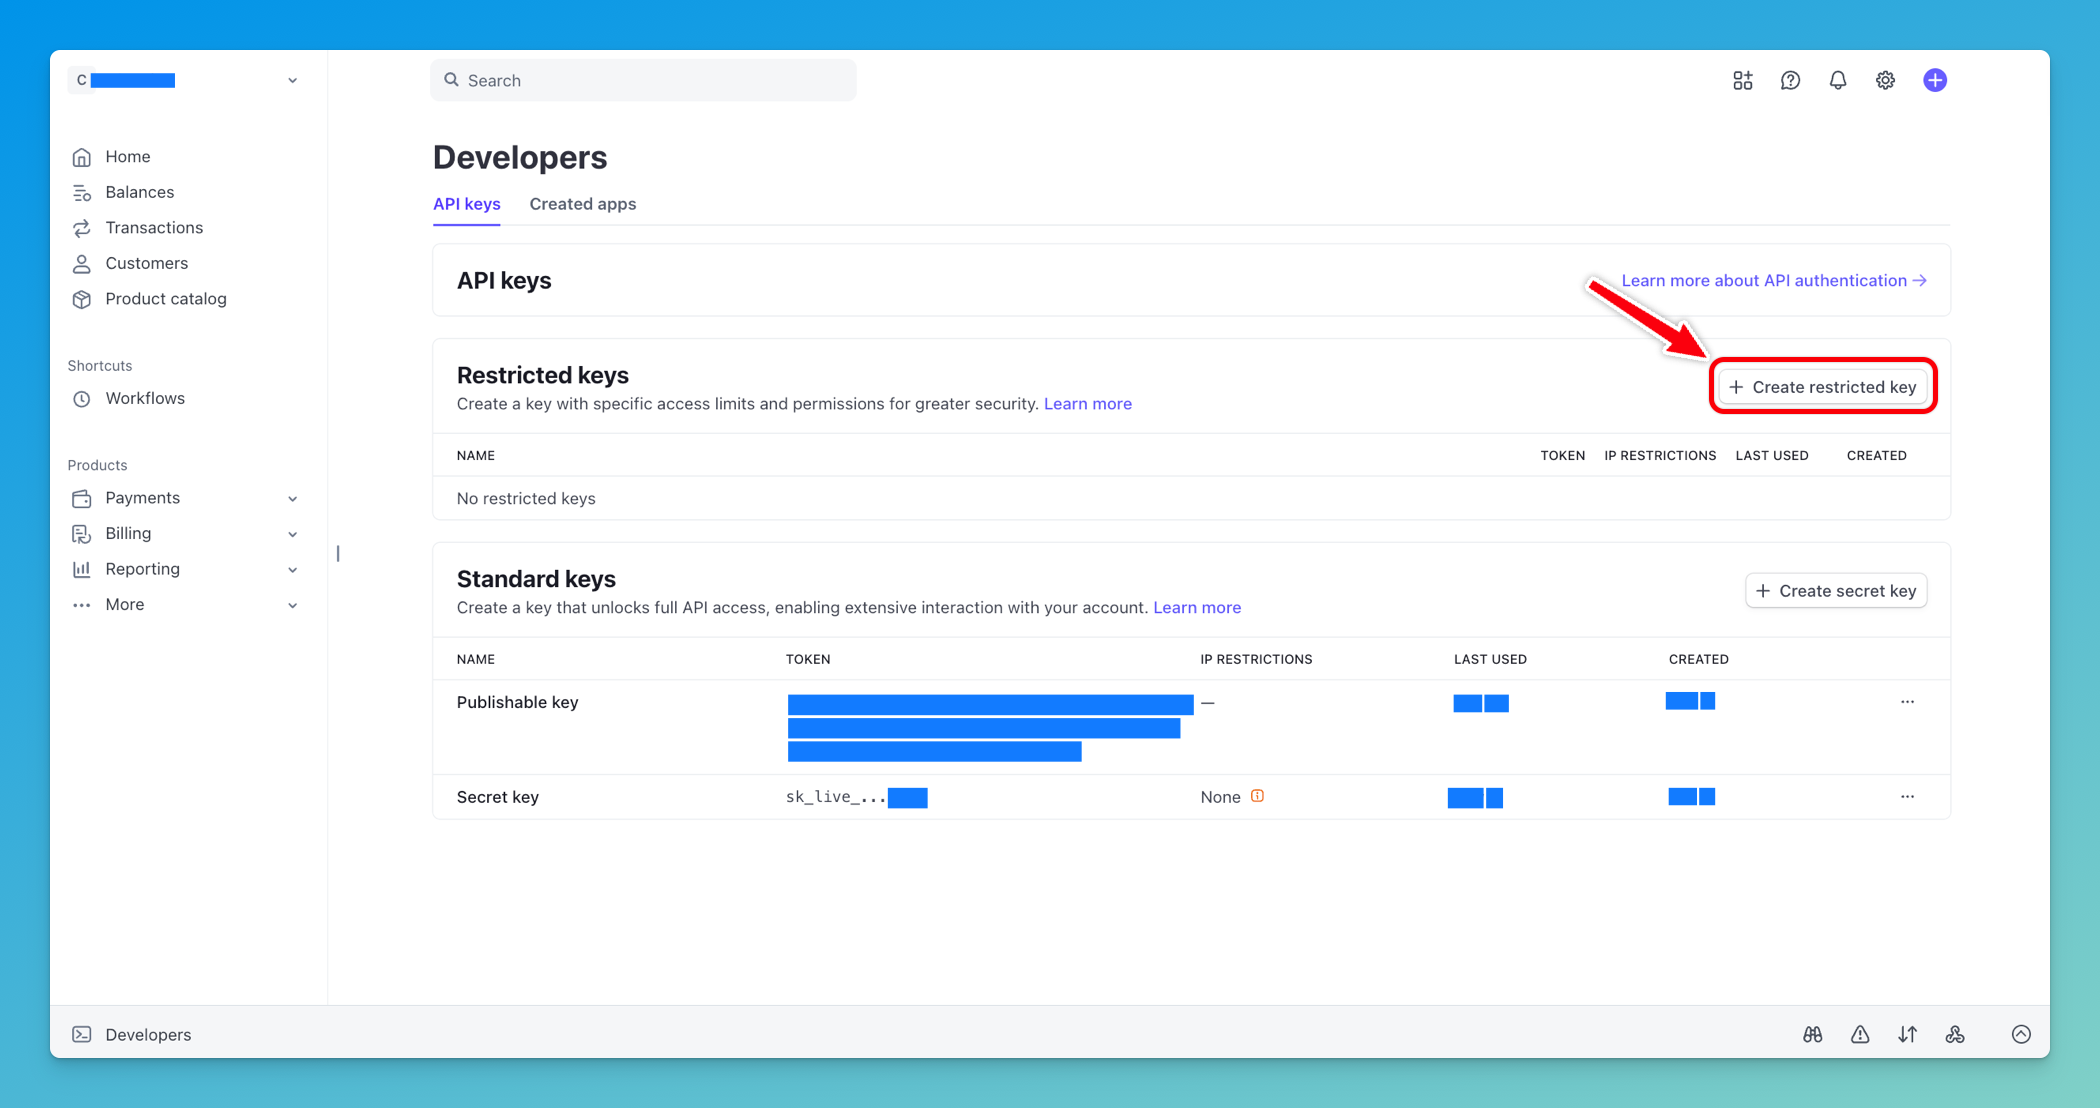
Step 4: Create a new API key
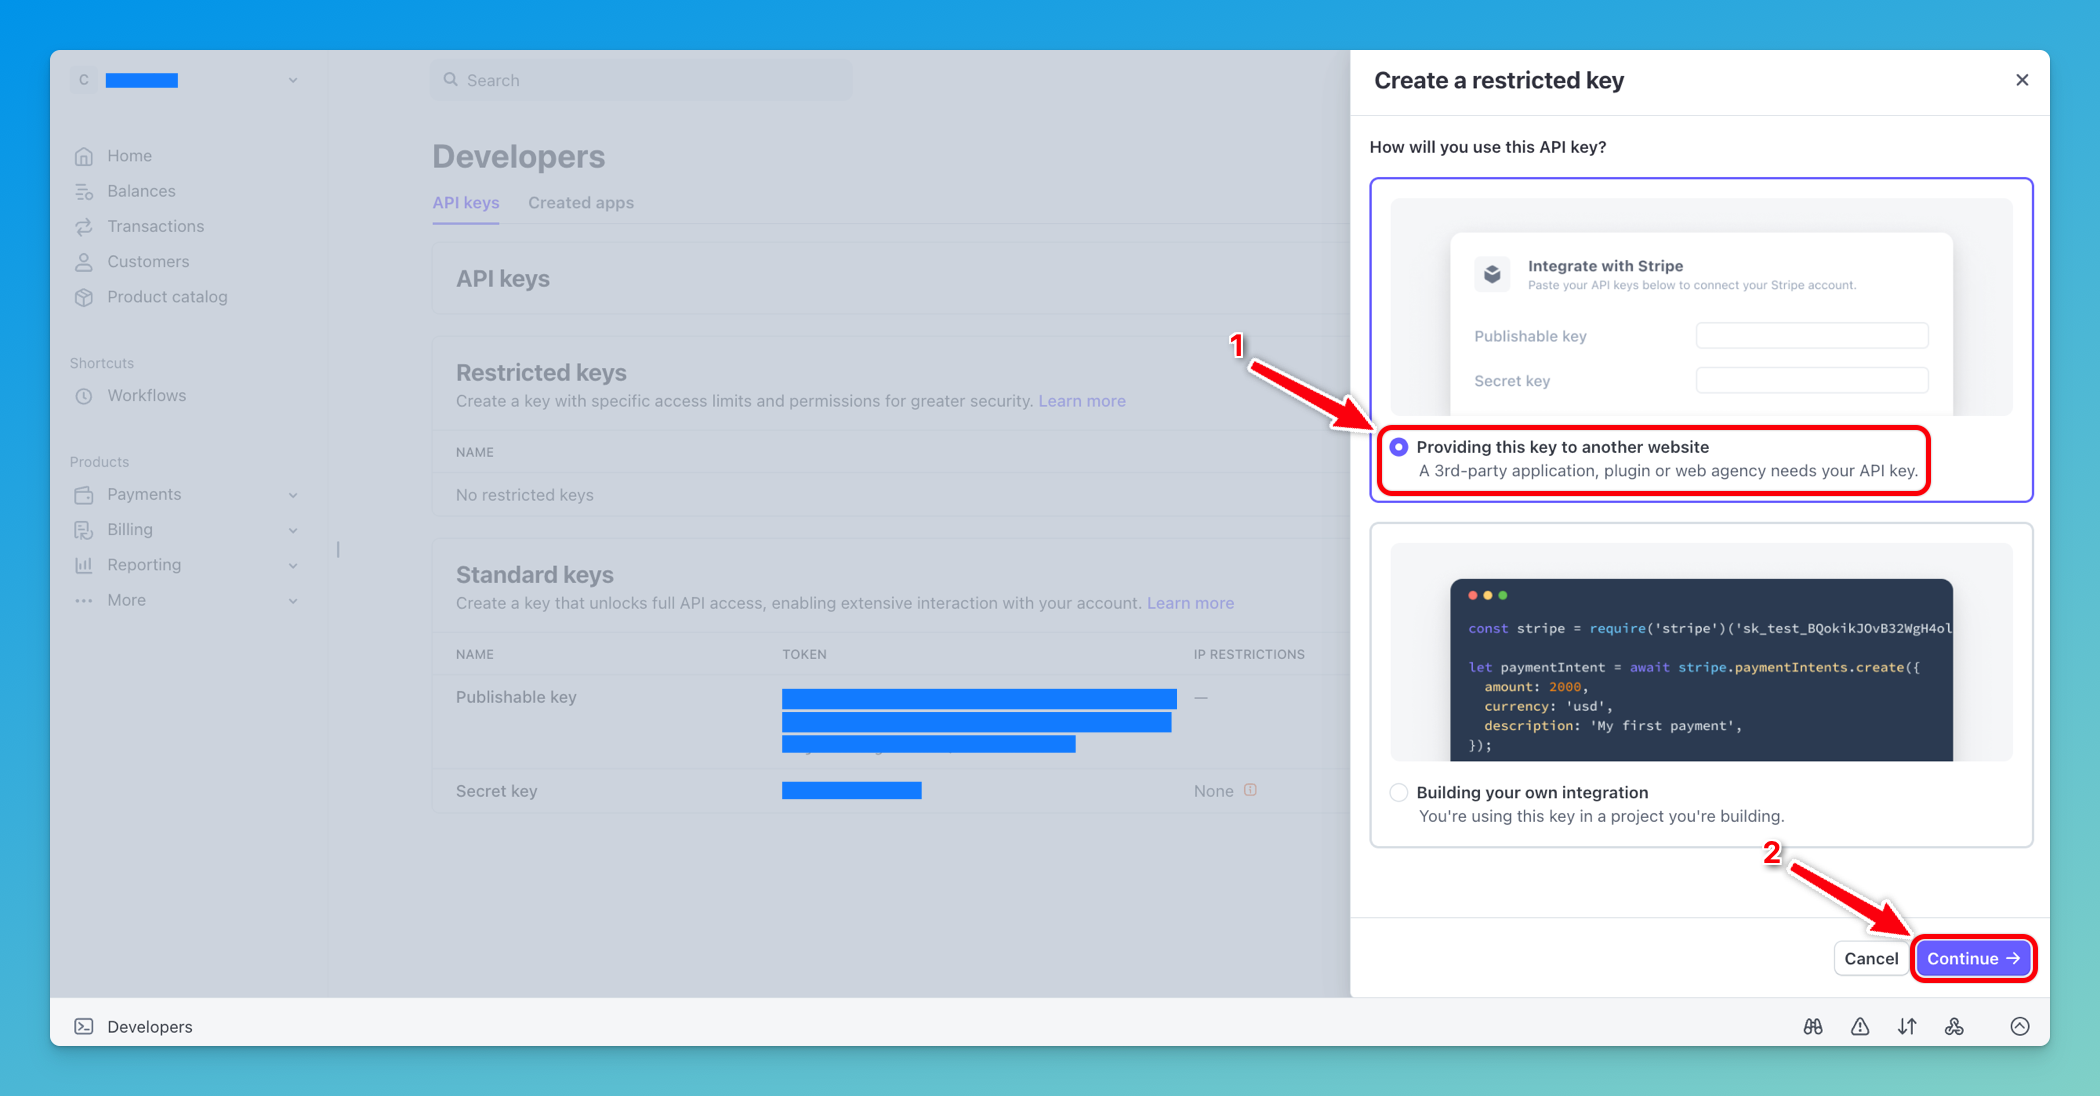
Section titled “Step 4: Create a new API key”-
Click on Create restricted key
-
Choose Providing this key to another website and then click Continue
-
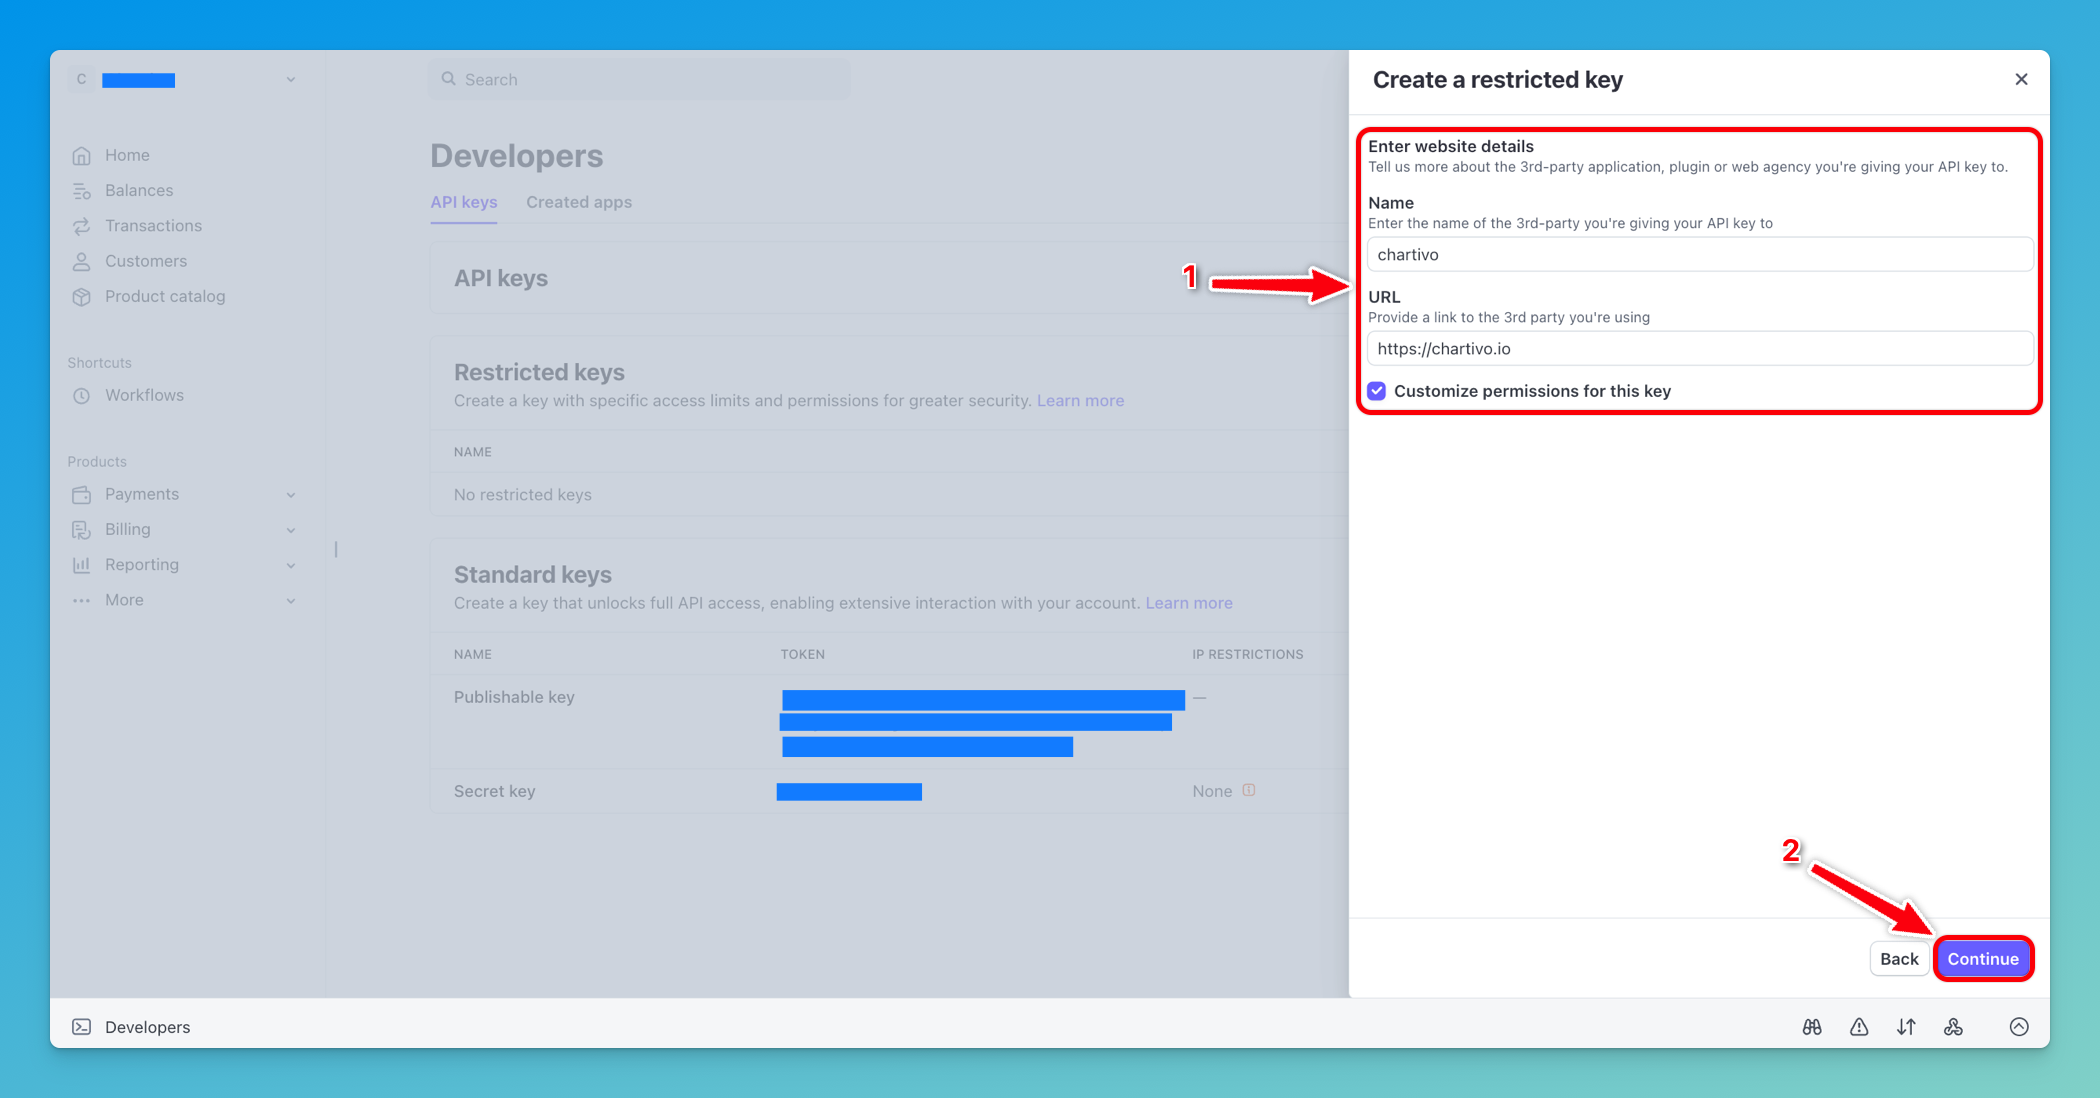
- Fill the Name field with a name for your key (e.g. Chartivo)
- Add https://chartivo.io in the URL field
- Check Customize permissions for this key checkbox
- Click Continue
-
In the API Keys tab, select Read permission for all the resource types you want to visualize and then Click Continue
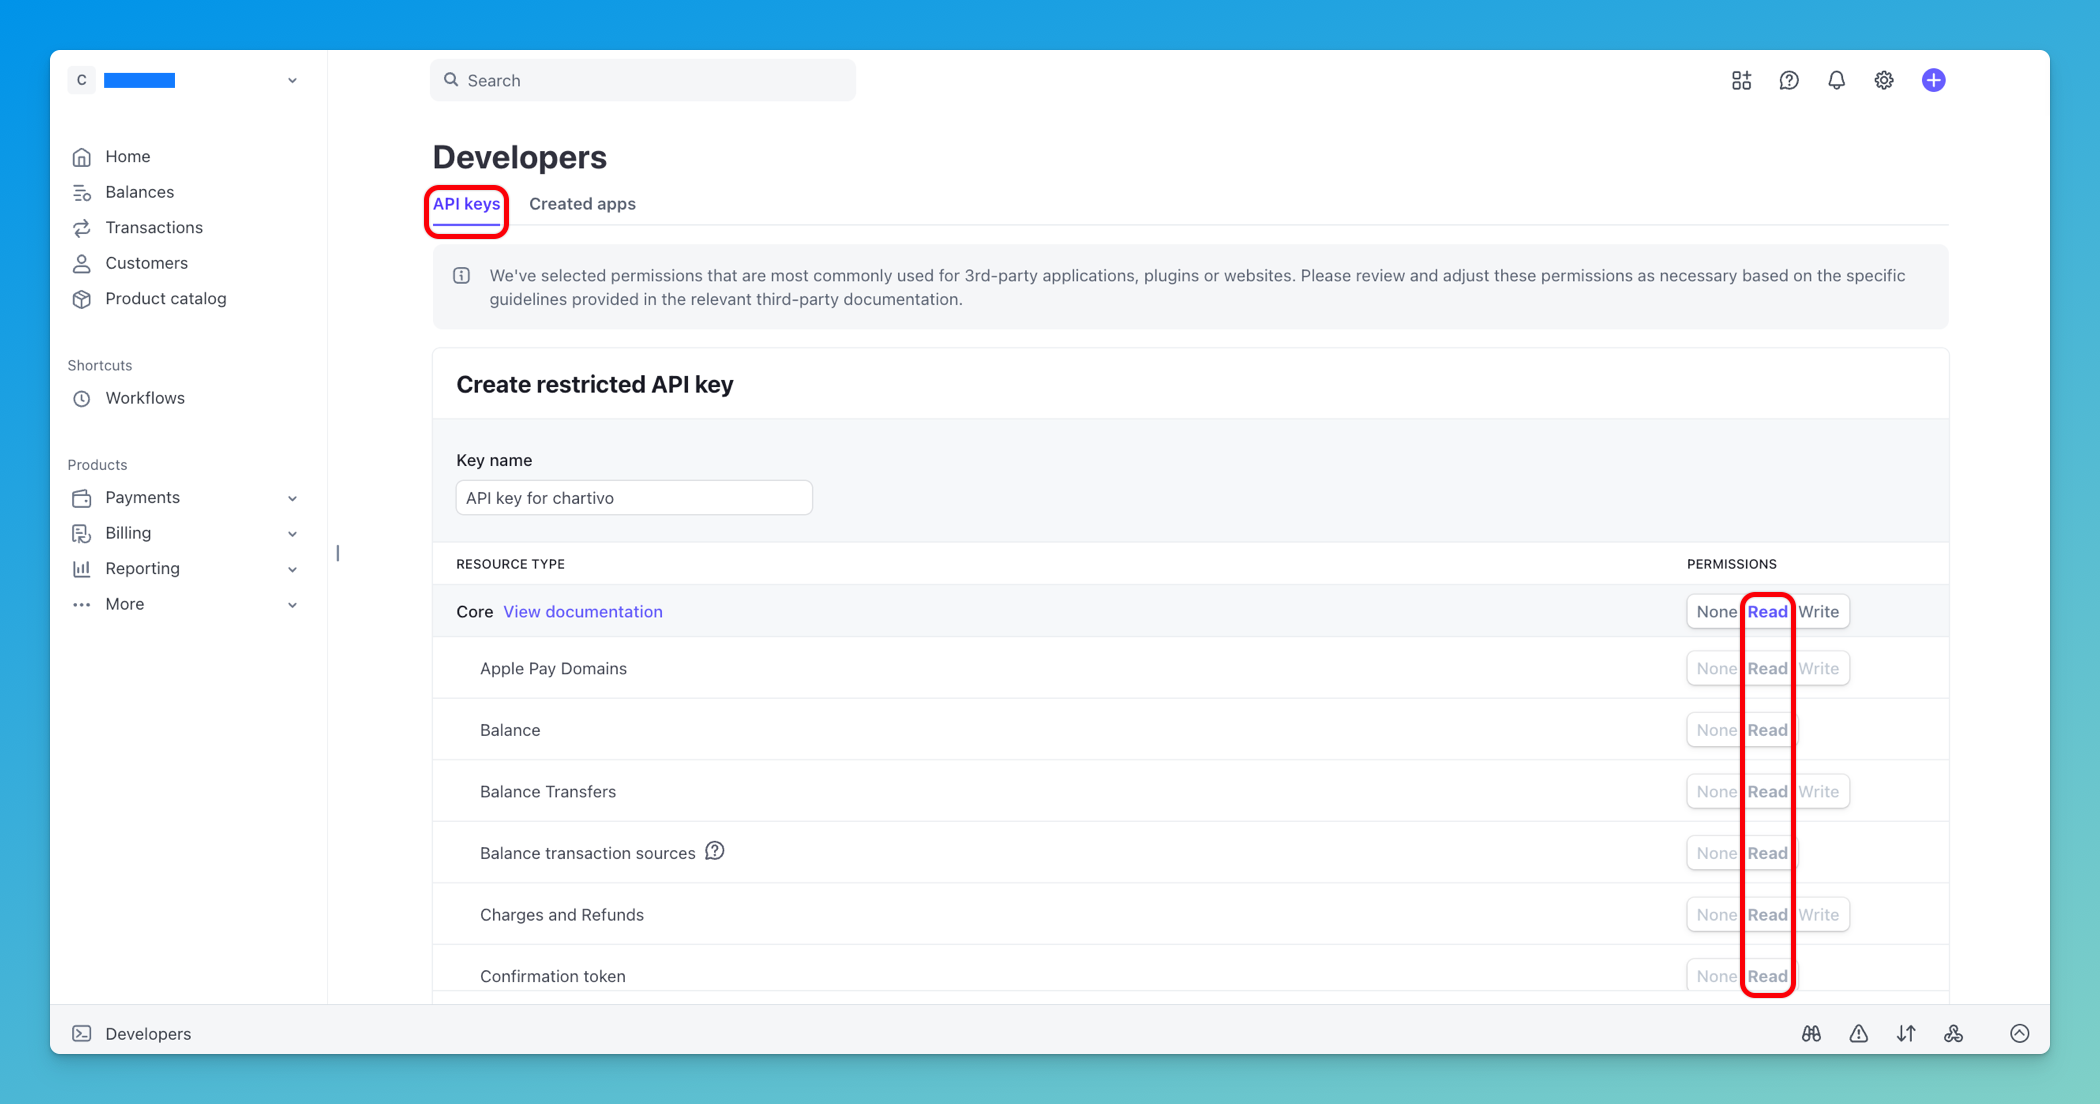
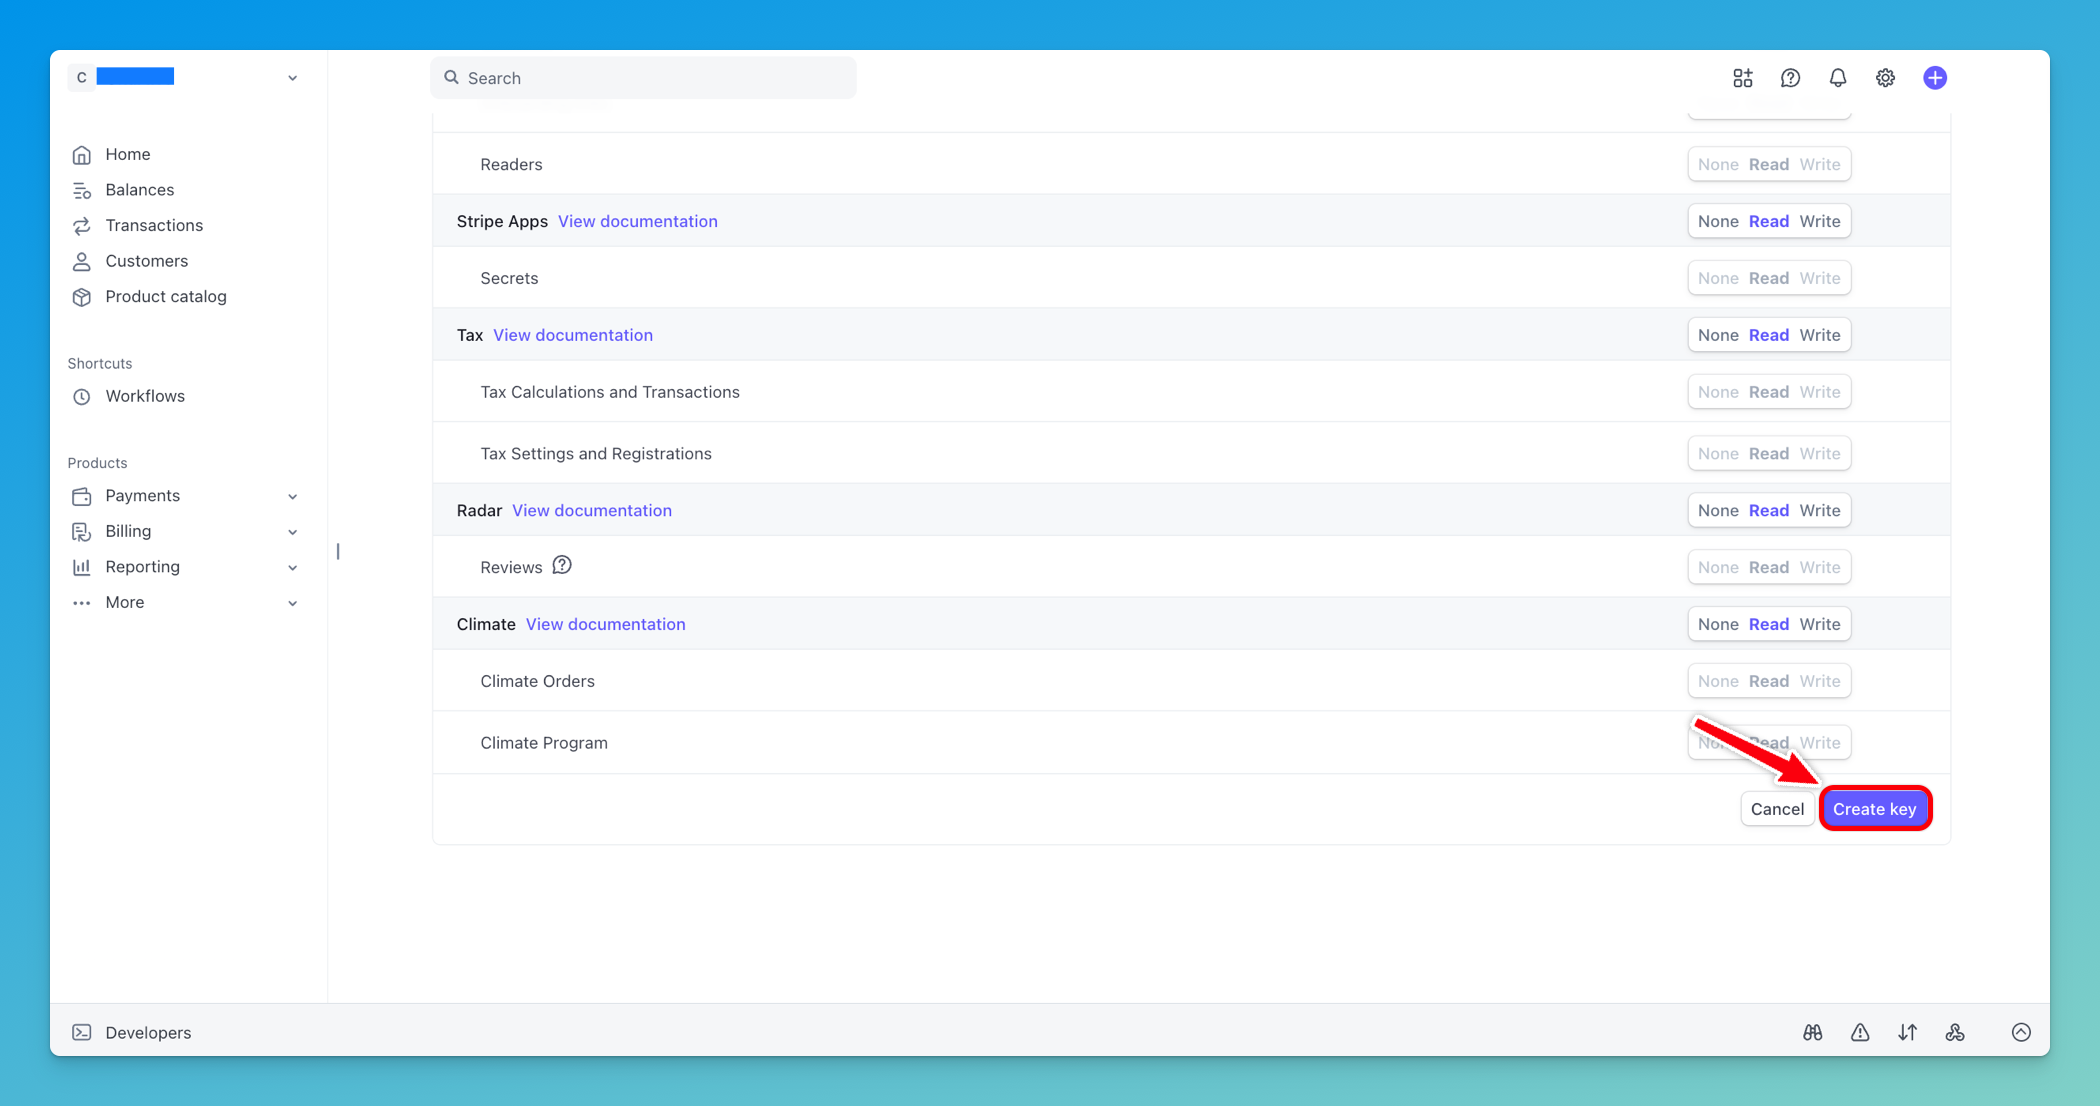
-
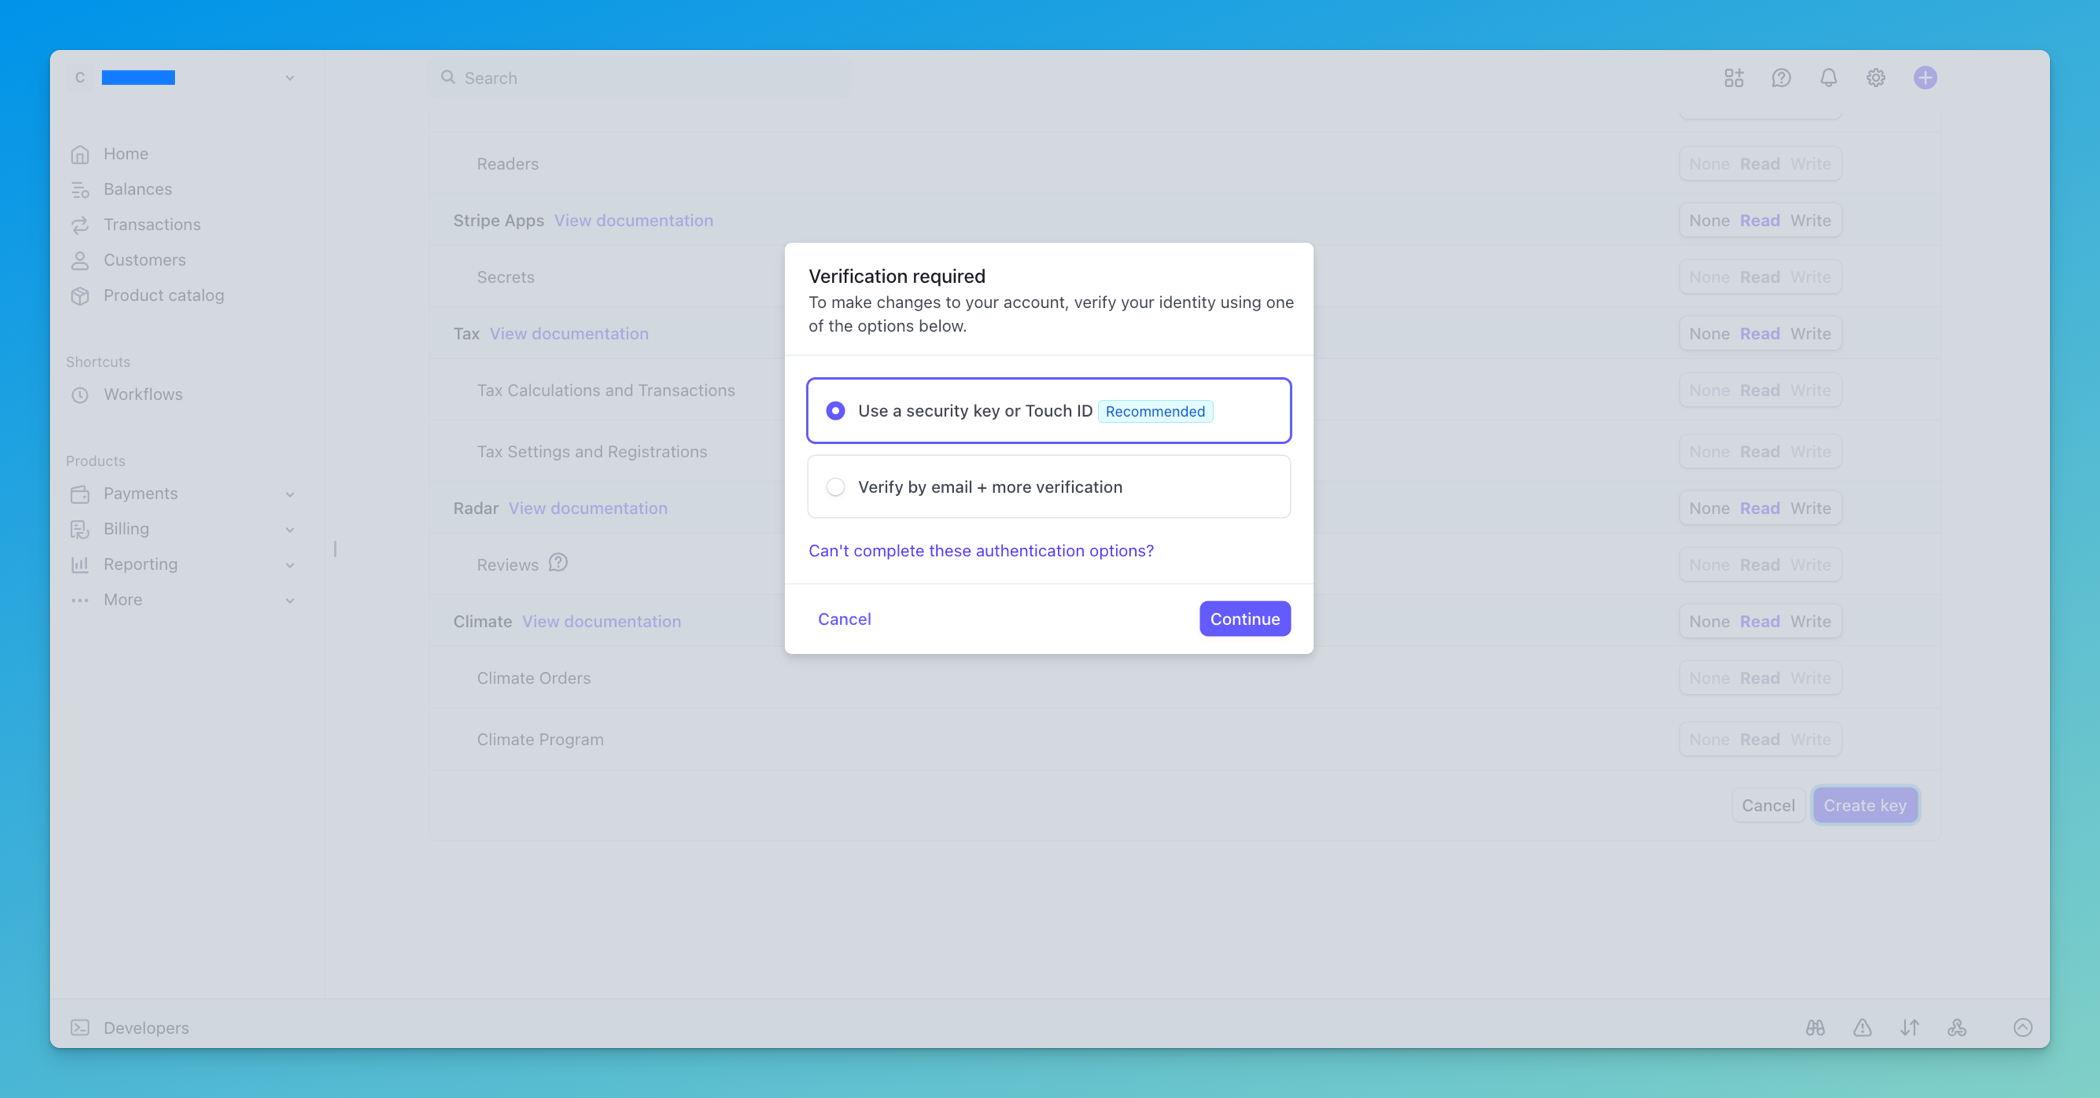
You will get a verification step to confirm your identity. Follow the instructions to complete the verification process
-
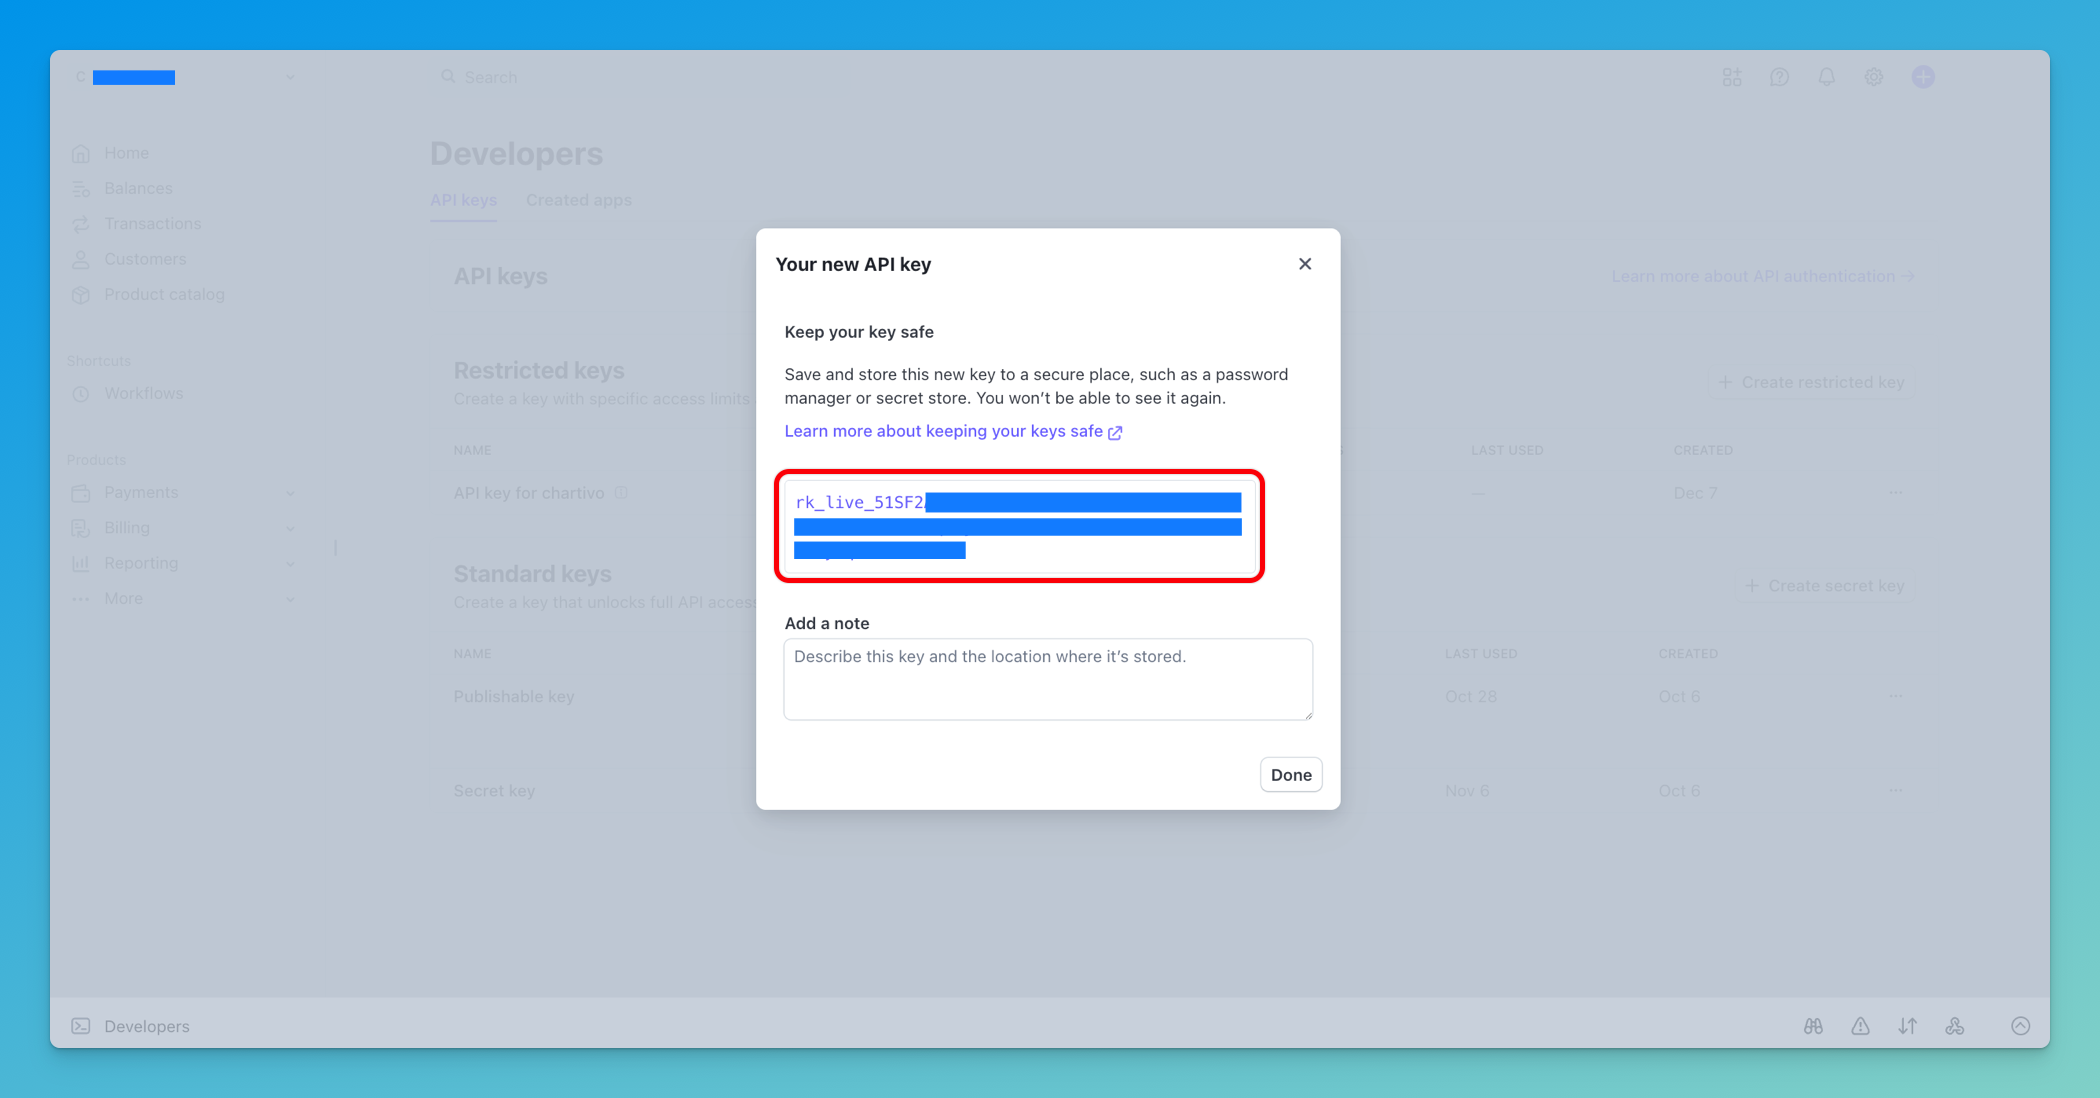
After the identity verification step, the new API key will be generated and displayed, copy it to your clipboard
⚠️ Important Security Notes:
- Never share your secret key publicly
- Never commit it to version control
- Treat it like a password
- If compromised, regenerate it immediately from the Stripe Dashboard
Step 5: Return to Chartivo and Enter Your API Key
Section titled “Step 5: Return to Chartivo and Enter Your API Key”- Switch back to the Chartivo browser tab
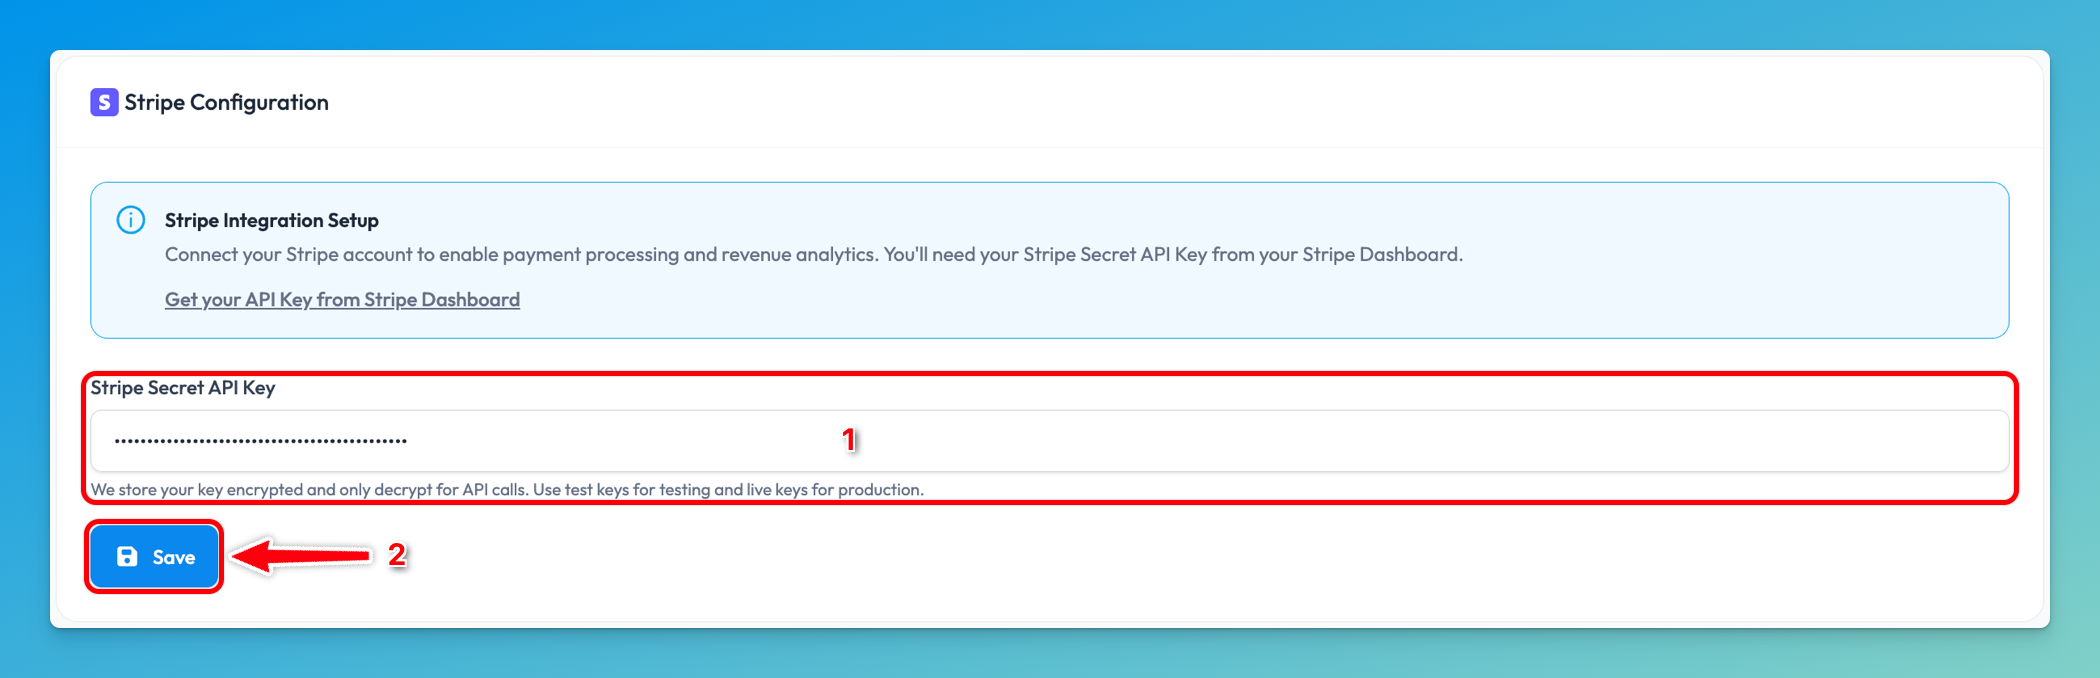
- In the Stripe Configuration card, locate the Stripe Secret API Key input field and paste your copied API key into this field
- The field should now contain your key (it will be masked as a password field)
- Click the Save button at the bottom of the Stripe Configuration form
- Wait for the confirmation message
Step 6: Verify Successful Configuration
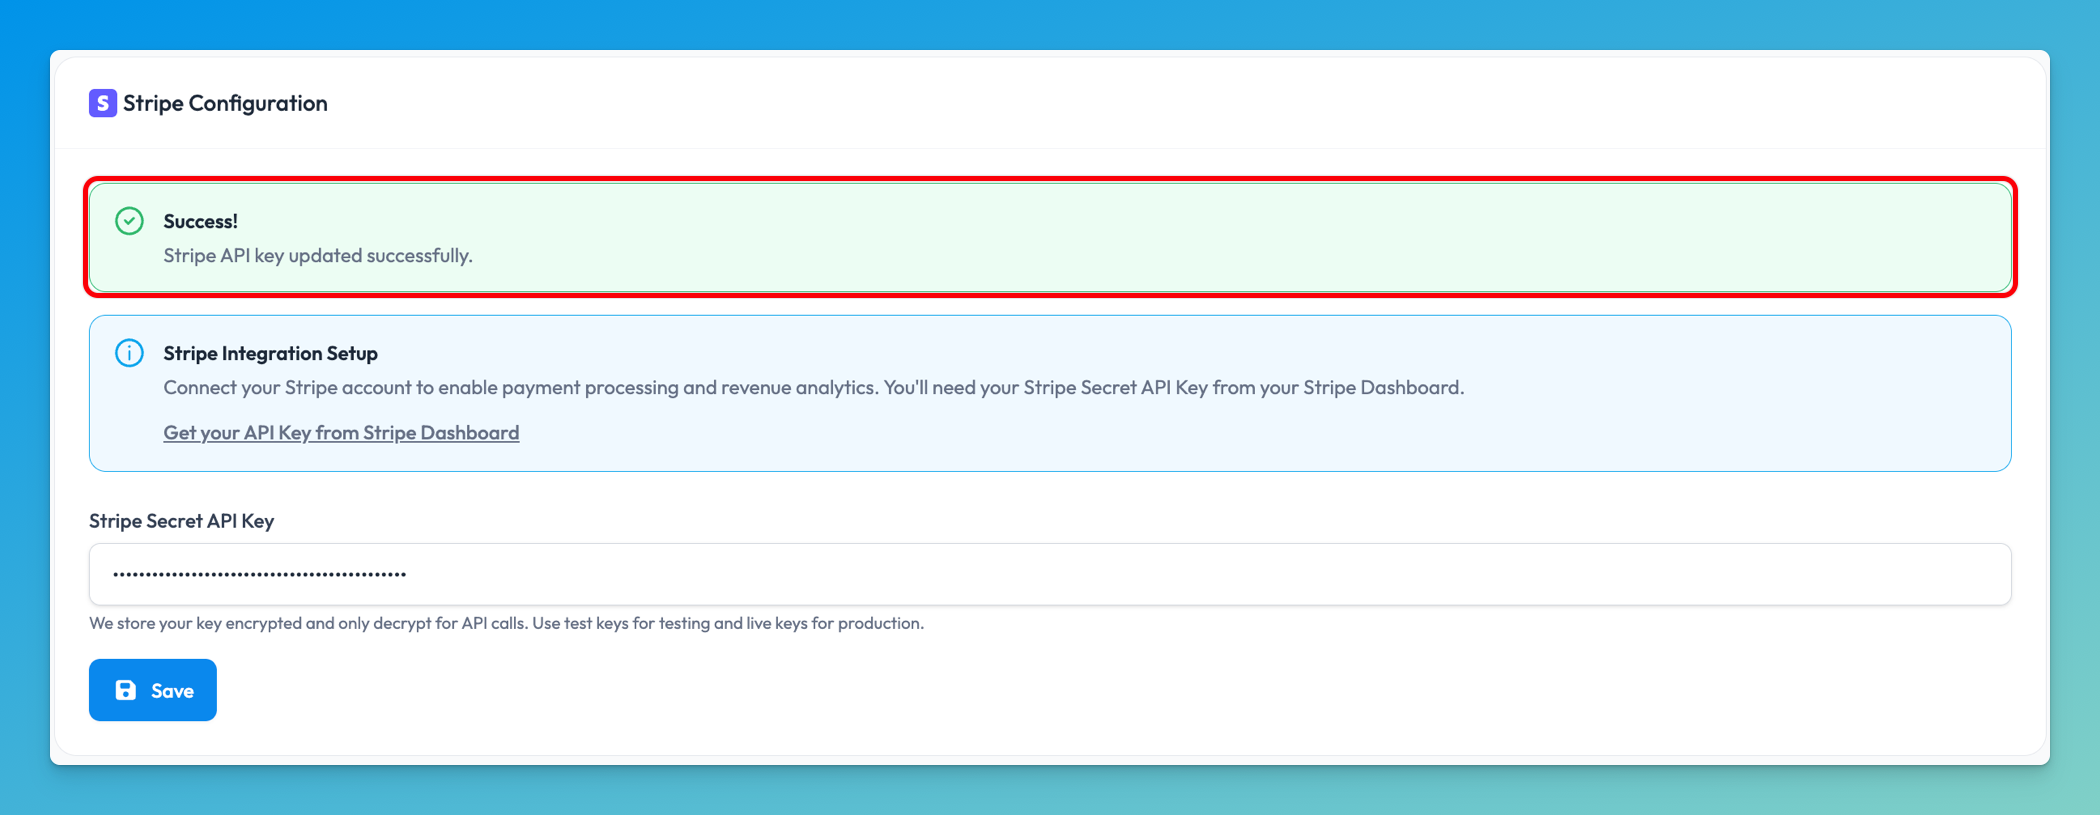
Section titled “Step 6: Verify Successful Configuration”After saving, you should see a success message confirming that your Stripe integration has been configured.
The success message will appear as a green banner at the top of the Stripe Configuration section.
Step 7: Test Your Integration
Section titled “Step 7: Test Your Integration”-
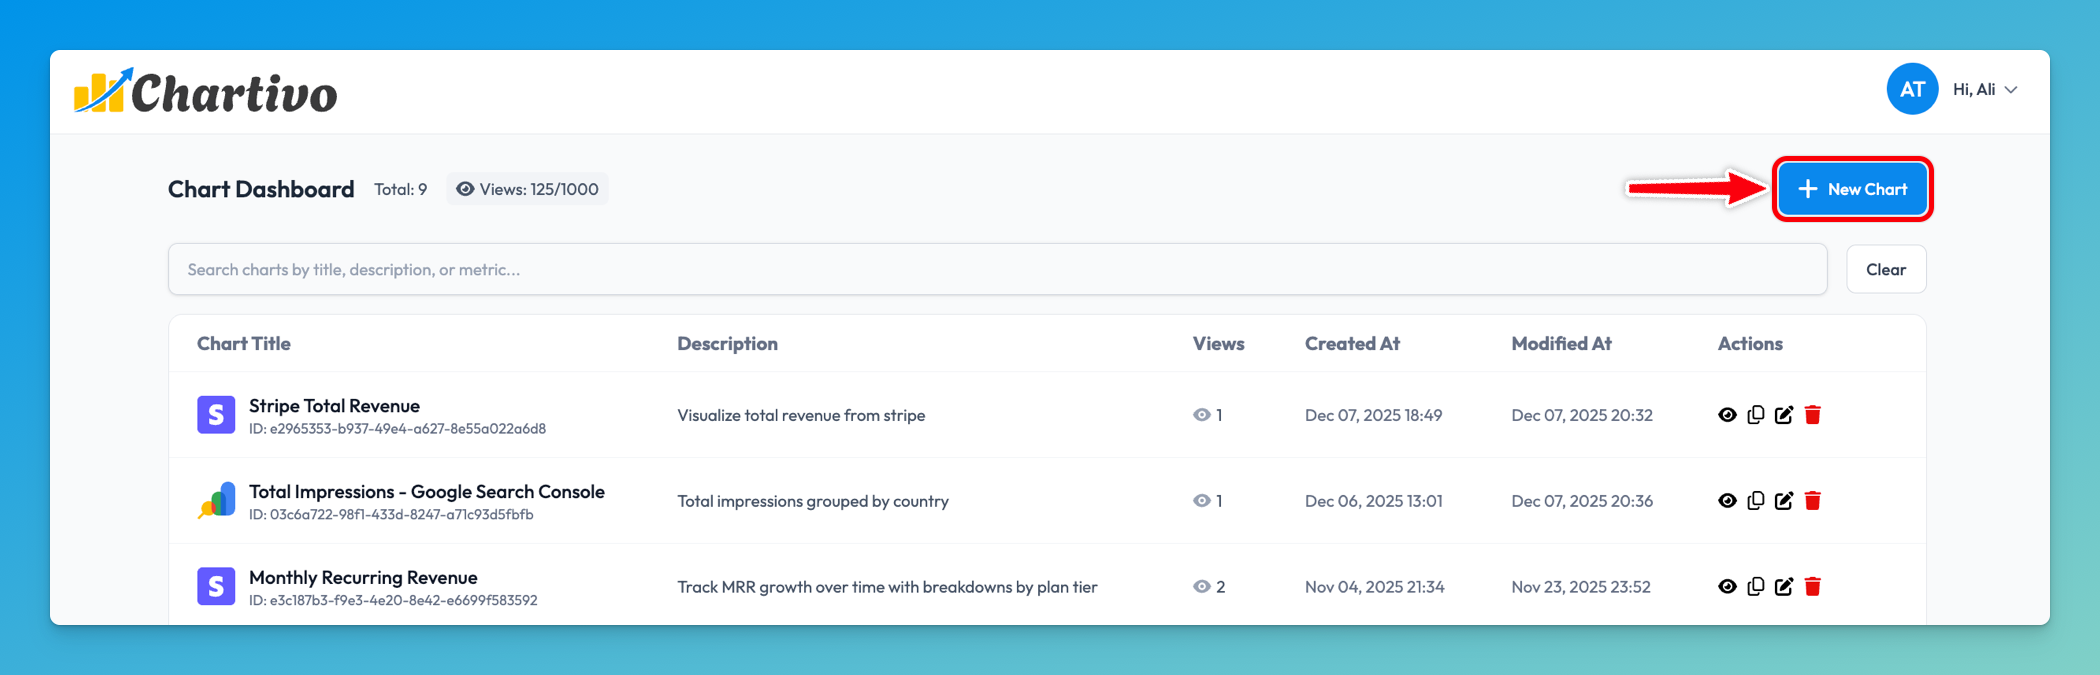
Navigate to the Home page in Chartivo by clicking Charivo’s logo
-
Click New Chart
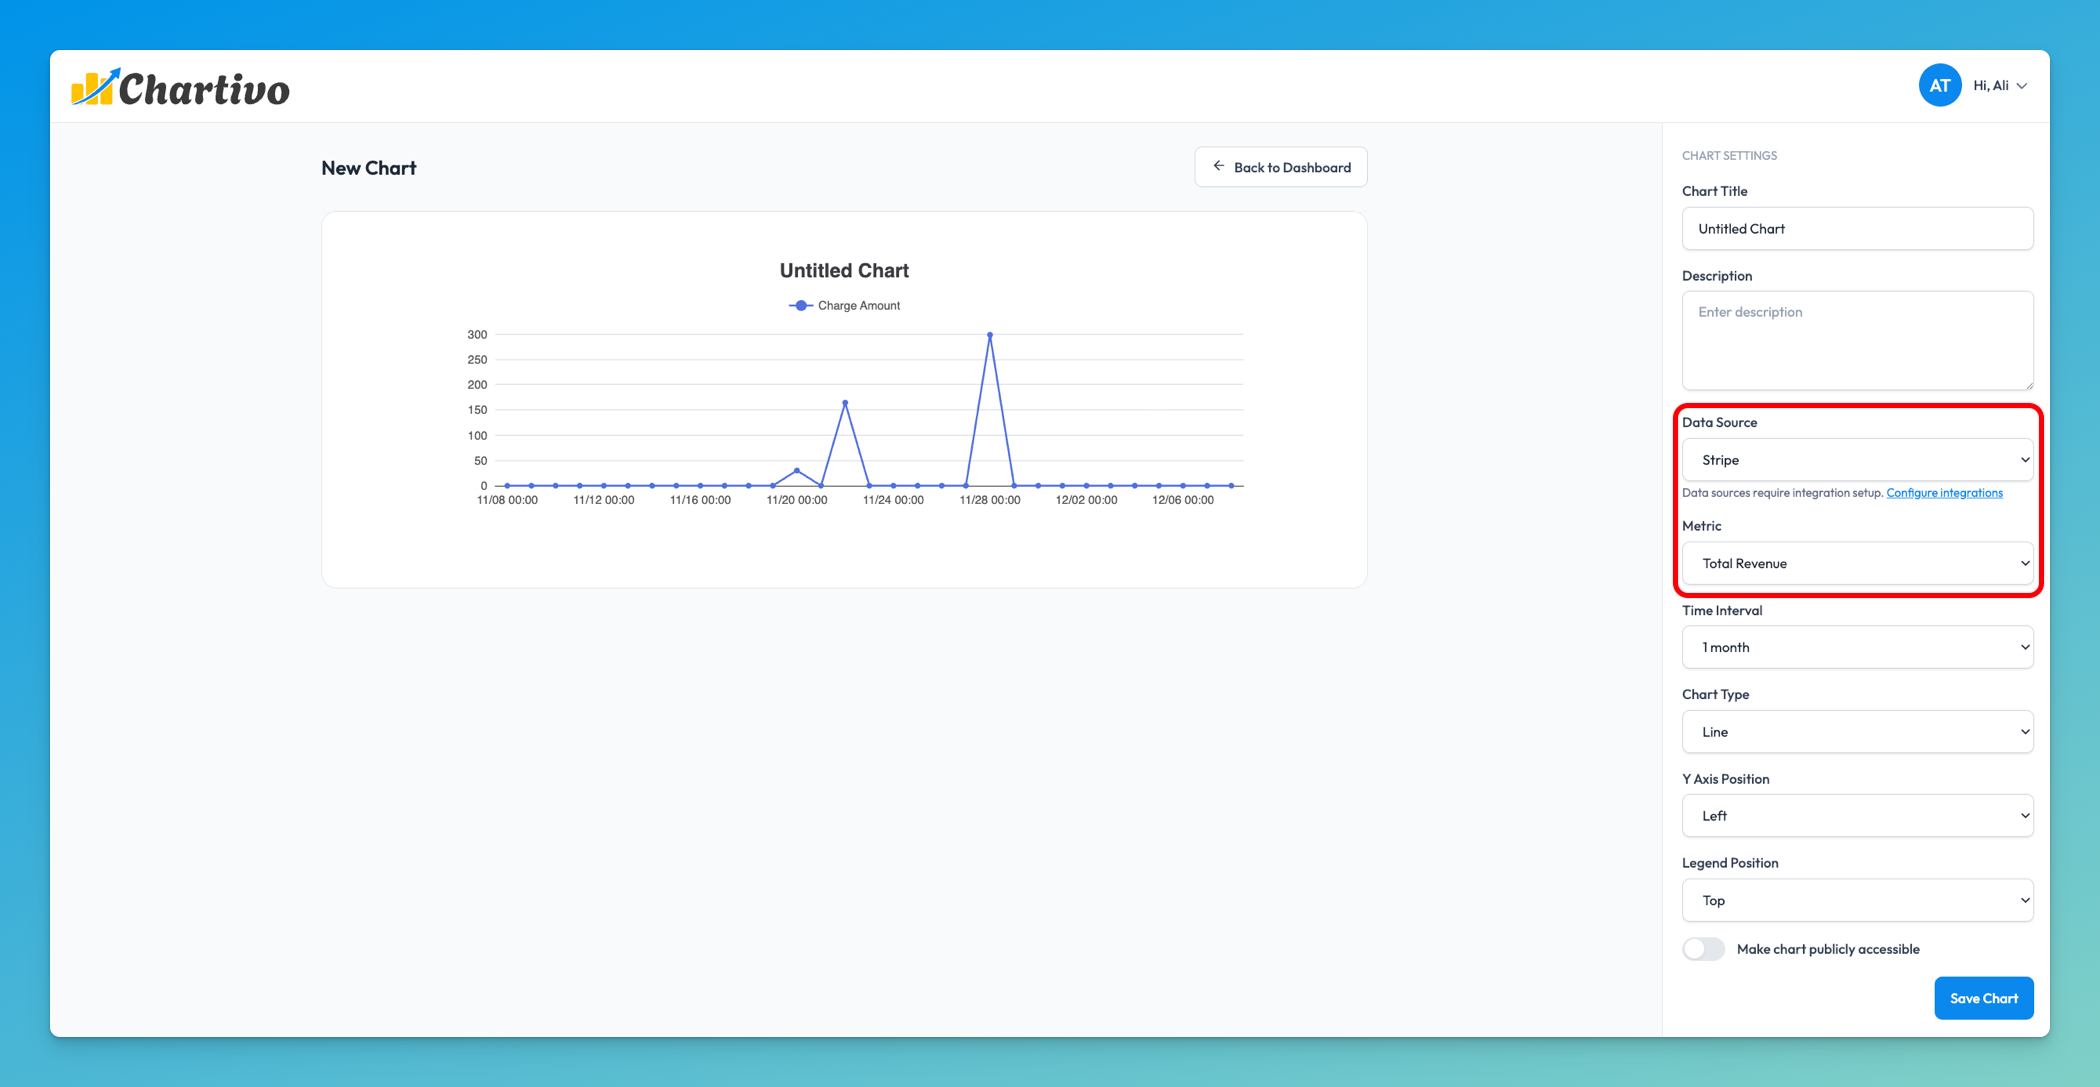
-
Select Stripe as your data source
-
You should now see available Stripe metrics such as:
- Charges
- Customers
- Revenue
- Refunds
- Disputes
- Balance transactions
Troubleshooting
Section titled “Troubleshooting”Error: “API Key Required”
Section titled “Error: “API Key Required””- Make sure the API key field is not empty
- Try pasting the key again
No Stripe Data Appearing
Section titled “No Stripe Data Appearing”- Verify your Stripe account has data for the selected date range
- If using test mode, ensure you have test transactions in your Stripe account
- Check that your API key has the necessary permissions
Connection Issues
Section titled “Connection Issues”Problem: Unable to connect Stripe account Solution: Make sure you’re logged into the correct Stripe account and have admin permissions
Problem: Data not showing up Solution: Allow up to 5 minutes for initial sync. Check that your Stripe account has data in the selected date range
Chart Issues
Section titled “Chart Issues”Problem: Chart shows “No Data” Solution: Verify your date range includes periods with Stripe activity. Check that the selected metrics exist in your Stripe account
Problem: Metrics don’t match Stripe dashboard Solution: Ensure you’re comparing the same time zones and date ranges. Chartivo uses UTC by default
Switching Between Sandbox and Live Modes
Section titled “Switching Between Sandbox and Live Modes”If you need to switch between sandbox and live environments:
- Return to the Stripe Dashboard
- Toggle between Sandbox/Live mode
- Copy the appropriate secret key using same steps shown above
- Return to Chartivo Integrations page
- Enter the new API key
- Click Save
Security Information
Section titled “Security Information”Chartivo encrypts your Stripe API key before storing it in our database. Your API key is only decrypted when making authorized API calls to Stripe on your behalf. We never expose your unencrypted API key in logs or user interfaces, and we never store or cache the customer data internally.
Q: How far back does the integration sync data?
A: We sync up to 1 month of historical data from your Stripe account.
Q: Can I connect multiple Stripe accounts?
A: No. We don’t support connecting multiple Stripe accounts currently.
Q: Does this work with Stripe sandbox mode?
A: Yes, you can connect both live and sandbox mode accounts.
Need Help?
Section titled “Need Help?”If you encounter any issues with the Stripe integration, email us at support@chartivo.io